Osstell Beacon
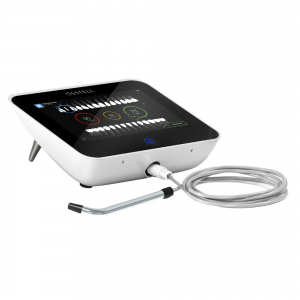
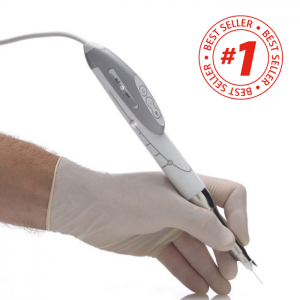
The Osstell Beacon from W&H allows you to objectively determine the stability of implants and measure the degree of osseointegration in a matter of seconds without jeopardising the healing process.
By providing fast and non-invasive diagnosis, this compact instrument allows for quick, well-informed decision making.
The wireless design grants you greater freedom of movement in your dental practice.
Why Choose the Osstell Beacon?
- Quickly evaluate implant stability and monitor osseointegration
- Significantly reduce treatment times
- Benefit from greater predictability when treating patients with risk factors
- Extract and share data and analyse results using the Osstell Connect portal
Improve Patient Treatment
The Osstell Beacon shows you within a matter of seconds when an implant is osseointegrated and can therefore be loaded. Because it operates wirelessly, it gives you greater freedom of movement in your dental practice. The data can be safely stored and compared on the Osstell Connect platform.
Evaluate Implant Stability... Fast
The demand for shorter treatment times and a growing number of patients with risk factors are posing ever greater challenges for dentists and the available technology. There is a growing need for evaluation of implant stability and osseointegration, which cannot be achieved using conventional methods such as torque and percussion tests. This calls for a more advanced diagnosis tool.
Act with Greater Certainty
Correct determination of implant stability and osseointegration is of fundamental importance to the success of any treatment. Osstell helps you to quickly and easily determine which implants can be treated and which require additional healing time.
This is the only objective quality assurance method that gives you ample warning if osseointegration has not progressed as expected, giving you and your patient greater certainty.
Interpret Results with Confidence
Because the Osstell Beacon has a Bluetooth connection, you can view the results of each implant measurement on the Osstell Connect platform using your PC, tablet or smartphone.
You can easily assess implant stability by comparing the baseline value determined upon insertion of the implant with the value prior to final restoration.
The ISQ* values are shown on a colour wheel, which provides information on the degree of osseointegration:
- Red circle: low stability, ISQ < 60
- Yellow circle: medium stability
- Green circle: high stability, ISQ ≥ 70
* ISQ: Implant Stability Quotient
Collaborate with Ease
The measured ISQ values can be sent to your PC and the Osstell Connect platform via Bluetooth dongle for ease of access. This means that you can analyse implant and patient data and collaborate more effectively with your colleagues.
Key Features
The key features of the Osstell Beacon include:
- Quick and easy evaluation of implant stability
- Monitoring of osseointegration
- Shorter treatment times
- Easy-to-interpret results using simple colour scheme
- Unique technology based on 900 scientific articles
- User-friendly and intuitive ISQ measurements
- Digital analysis using Osstell Connect
- Highly suited to a digital working environment
Frequently Asked Questions
Do you have a question regarding the Osstell Beacon? Our FAQs are the fastest way to get help. Below you will find the most frequently asked questions regarding the Osstell Beacon. If you can’t find the answer you are looking for, don’t hesitate to contact us.
No, you can also register your IDx at osstellconnect.com. All you need is the serial number.
Before each use, moisten a gauze or soft cloth with an acceptable (see list below) surface disinfectant and wipe the whole Osstell Beacon instrument.
Do not autoclave the Osstell Beacon instrument.
Routinely check the surface of the instrument tip and overall surface for possible cracks and resins.
Acceptable Cleaners:
- Isopropyl alcohol
- Ethyl alcohol-based cleaners
Do not use:
- Strong alkali detergent of any type, including hand soaps, dish soaps and bleach-based cleaners
- Hydrogen Peroxide based cleaners Abrasive Cleansers
- Acetone of hydrocarbon-based cleaners MEK (Methyl Ethyl Ketone)
- Birex Glutaraldehyde
- Quaternary Ammonium Chloride salt-based cleaners
The Osstell Beacon is delivered from factory in a “transport” mode, where the built-in motion sensor is deactivated. To deactivate the transport mode and start charging, connect the small USB connector of the Osstell USB cable to wide end of the instrument. Connect the large USB connector to a standard USB outlet of a PC, laptop or charger.
Although it is possible to use the Osstell Beacon directly, depending on the status of the built-in rechargeable battery, charging the battery for at least 3 hours before using the Osstell Beacon instrument is recommended.
The Osstell Beacon is activated by a built-in motion sensor. As soon as the motion sensor detects movement, the Osstell Beacon will start up and show the battery status and then be ready for measurement in the BL (Buccal – Lingual) direction, which is indicated in the upper display.
The Osstell Beacon will start to measure, indicated by an audible sound, when near an Osstell SmartPeg or Test peg due to a built-in magnetic detector that senses the magnet on the top of the Osstell SmartPeg/TestPeg. Measured data will be shown in the upper display combined with a coloured light indication below the tip.
The red, yellow and green colour indicates if the measured ISQ value corresponds to a low, medium or high implant stability according to the ISQ scale guidance.
After 60 seconds of no motion, the Osstell Beacon will turn off automatically.
- Activate the Osstell Beacon by picking it up. The instrument will start-up and after showing the battery status, the instrument will be ready for measurement in the BL (Buccal – Lingual) direction, which is prompted in the upper display as well as optimal angle towards the Smartpeg.
- Place a barrier sleeve over the Osstell beacon instrument.
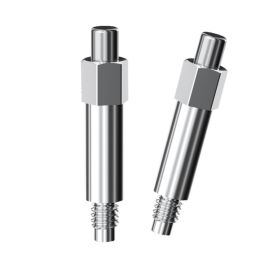
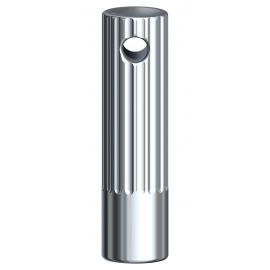
- Place the SmartPeg into the SmartPeg Mount. The SmartPeg is magnetic, and the SmartPeg Mount will hold the SmartPeg. See fig 2. Attach the SmartPeg to the implant or abutment by screwing the SmartPeg Mount using finger force of approximately 4-6 Ncm. Do not over-tighten, to avoid damaging the SmartPeg threads.
- Hold the instrument tip close (2-4mm) to the top of the SmartPeg without touching it. Sometimes, you will need to go as close as 1 mm. An audible sound indicates when measurement has started, and measured data will be shown in the upper display combined with a colored light indication below the tip.
- Bring the instrument out of the mouth to clearly read the ISQ value and the colored indication. The measured ISQ values will be displayed in the upper display for a couple of seconds and then switch to be ready for measurement in the mesial-distal direction.
- Repeat step 4 and the sequence starts over and the Osstell Beacon is ready for measurement in the BL (Buccal- Lingual) direction again.
- When all measurements are performed, remove the SmartPeg by using the SmartPeg Mount. The instrument is automatically turned off after 60 seconds of inactivity.
Two years.
Possible explanations include:
Re-Used SmartPeg: The SmartPegs are disposable and should only be used for one or multiple measurements at one treatment session, for a single patient only. Repeated re-use may result in false readings due to wear and tear of the soft aluminium SmartPeg threads.
Wrong SmartPeg type selected for the implant: See SmartPeg reference list, osstell.com/smartpegguide
Bone or soft tissue between SmartPeg and Implant: Clean the Implant prosthetic connection before attaching the SmartPeg.
Electromagnetic interference: Remove the source of electromagnetic interference.
Probe is held too far away from the SmartPeg: Hold the probe 2-4 mm away from the SmartPeg.

